Implementing Actito with Google Tag Manager
Google Tag Manager, a free marketing tool from Google, quickly became popular by allowing websites to implement Analytics, Ads and other Google products without editing any code in your website. The ability to inject markup in any of your pages can also be a way of reducing the time to implement Actito and all of its features.
Setting up Actito
If you're already an Actito user with an existing Actito app, it's time to explore the world of Website Push notifications. This powerful feature allows you to send remote notifications directly to your website visitors. To get started, you'll need to generate VAPID credentials and upload a Safari Website Push certificate to ensure compatibility with a wide range of browsers. For detailed instructions, refer to this article.
Configuring the service worker
At the heart of the Web Push protocol is the Service Worker, a crucial component that handles remote notifications for your website. Actito simplifies this process by providing you with all the necessary code through our library. Here's how to set it up:
Step 1 - Create a sw.js file
Begin by creating a sw.js file and place it in the root directory of your website. This file will serve as the backbone of your Service Worker.
Step 2 - Add the following content to sw.js
Inside your sw.js file, insert the following code:
importScripts('https://cdn-mobile.actito.com/libs/web/v5/{{version}}/actito-push-sw.js')
This code snippet sets up the Service Worker to respond to incoming push events and display notifications with the specified title and options. You can customize the notification to suit your branding and messaging needs through the Actito platform.
Setting up Google Tag Manager
If you're new to the world of Google Tag Manager (GTM), don't worry; we've got you covered. In this guide, we'll walk you through the essential steps to set up your GTM account and get it ready to manage all your website tags seamlessly.
Configuring GTM
Step 1 - Create your GTM account
First things first, if you don't already have a GTM account, you'll need to create one. Follow these steps:
- Create an account: Visit Google Tag Manager to create your account. If you already have a Google account, signing in is a breeze.
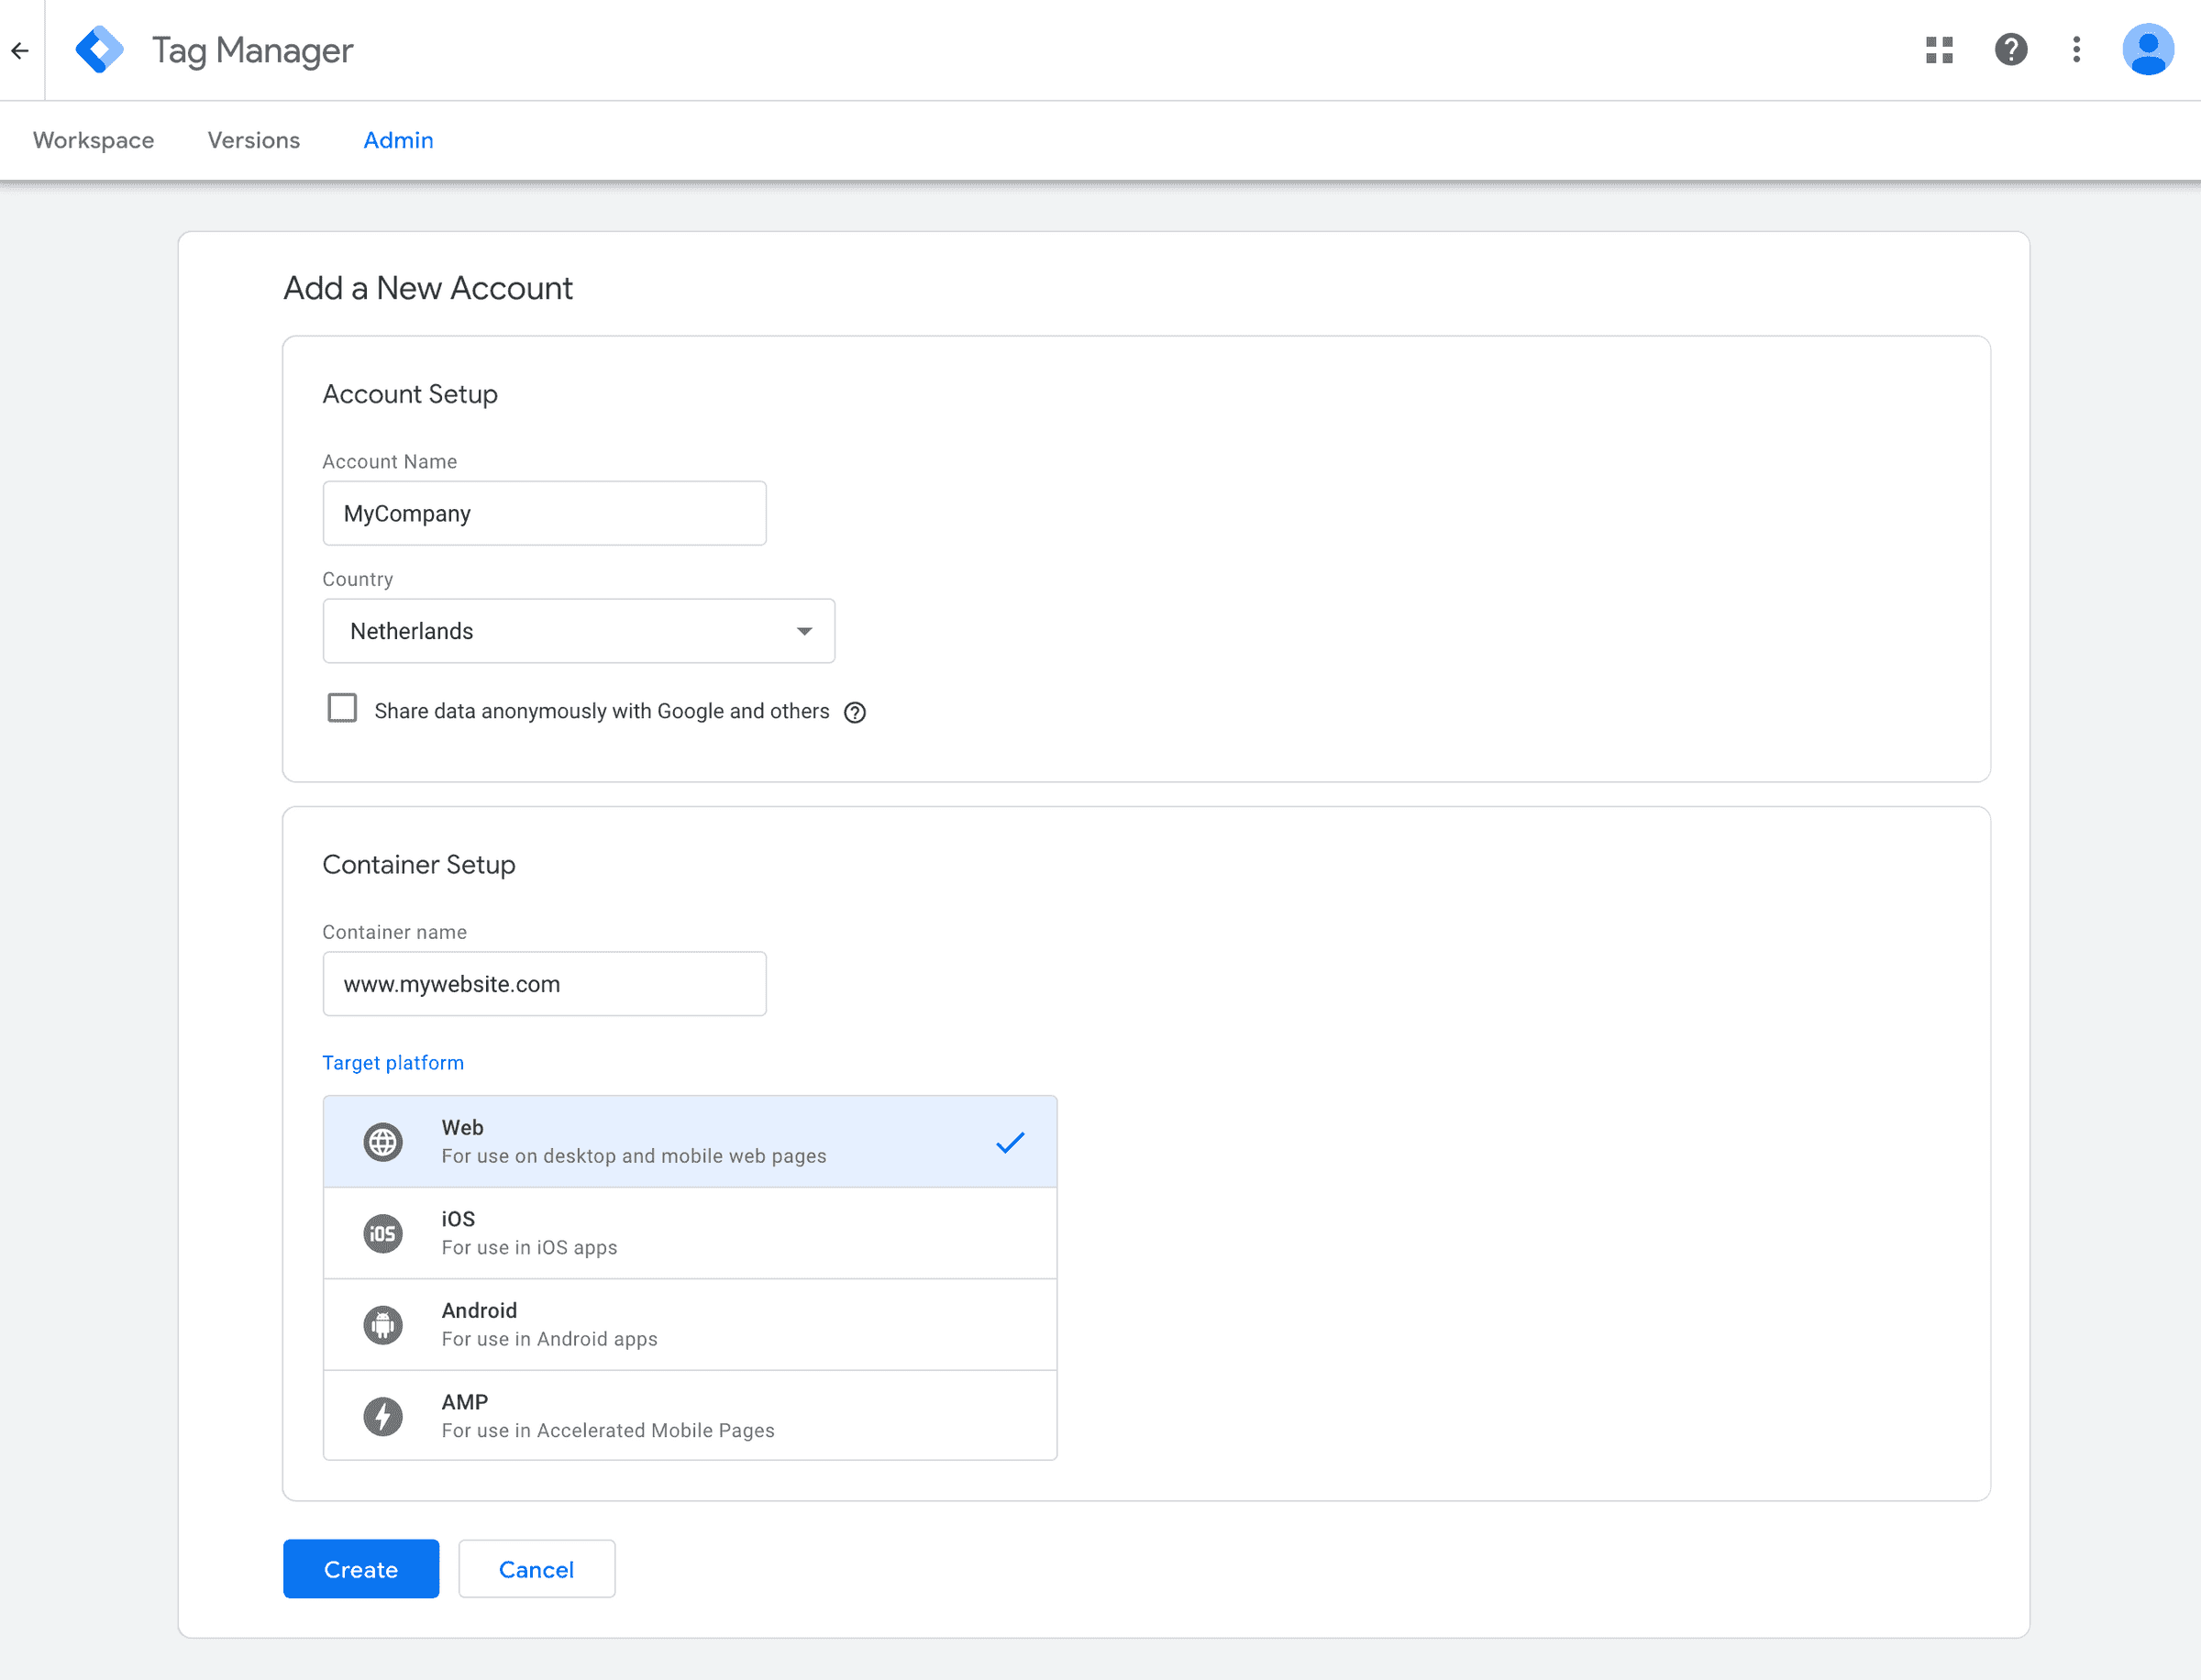
- Create your account: Once signed in, head to the Tag Manager dashboard. Here, you'll start by creating an account for all your tags. Click on the "Create Account" button on the initial page.
- Provide account information: You'll need to provide some basic information about your company and your new container. Ensure you select "Web" as the container type, as this is what we'll be focusing on.
Step 2 - Add GTM scripts to your website
At this point, you'll receive the Google Tag Manager scripts that you need to integrate with your website. These scripts are vital for GTM to work its magic.
Once you've successfully added these scripts to your website, congratulations! Your website is now equipped to leverage the power of Google Tag Manager.
Creating your first tag
Let's dive right in and start implementing Actito. In your GTM account, navigate to the Workspace section. Here, you'll find the option to "Add a new tag".

Follow these steps to configure your Tag:
- Name your tag: Choose a memorable name for your tag. This will make it easier to identify, especially if you plan to use GTM extensively. Consider something unique like Actito.
- Tag Configuration: In the Tag Configuration section, select "Custom HTML". This is where you'll load the custom JavaScript needed to integrate Actito. Paste the provided code snippet, which is your starting point for minimal integration.
<script type="module">
  import { loadStylesheet, configure, launch } from 'https://cdn-mobile.actito.com/libs/web/v5/{{version}}/actito-core.js';
  import 'https://cdn-mobile.actito.com/libs/web/v5/{{version}}/actito-in-app-messaging.js';
  import { onNotificationOpened, onNotificationActionOpened } from "https://cdn-mobile.actito.com/libs/web/v5/{{version}}/actito-push.js";
  import { presentNotification, presentAction } from "https://cdn-mobile.actito.com/libs/web/v5/{{version}}/actito-push-ui.js";

  loadStylesheet('https://cdn-mobile.actito.com/libs/web/v5/{{version}}/actito-in-app-messaging.css');
  loadStylesheet('https://cdn-mobile.actito.com/libs/web/v5/{{version}}/actito-push.css');
  loadStylesheet('https://cdn-mobile.actito.com/libs/web/v5/{{version}}/actito-push-ui.css');

  onNotificationOpened((notification) => {
    presentNotification(notification);
  });

  onNotificationActionOpened((notification, action) => {
    presentAction(notification, action);
  });

  try {
    configure({
      applicationKey: 'YOUR_APPLICATION_KEY',
      applicationSecret: 'YOUR_APPLICATION_SECRET',
    });

    await launch();
  } catch (e) {
    console.log('Something went wrong: ' + e);
  }
</script>
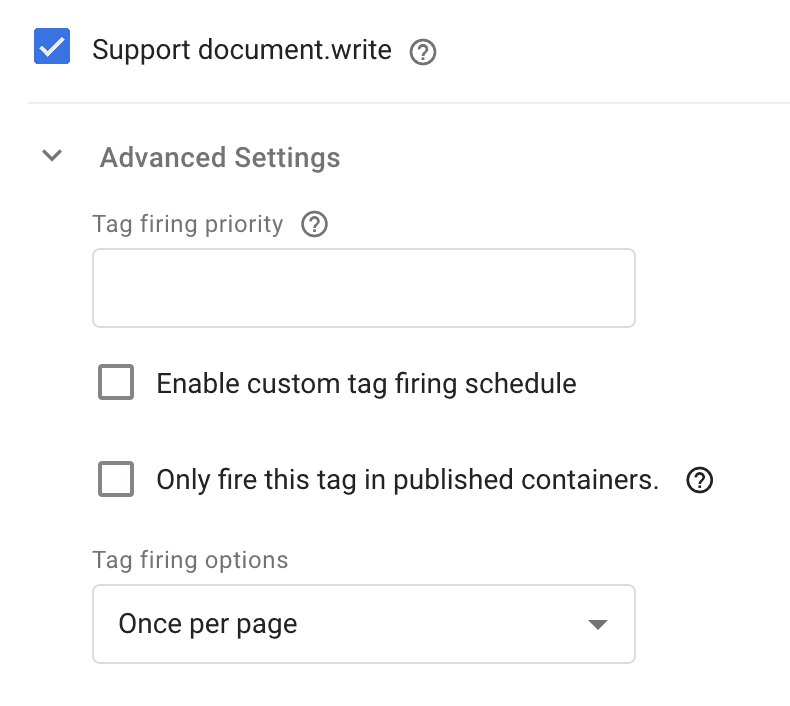
Make sure to enable the Support document.write checkbox. This is essential for Actito to load correctly. Additionally, select Once per page as the Tag Firing Options in the Advanced Settings section.
- Triggering: You'll likely want Actito to run on every page of your website. Choose the All Pages/Page view option for triggering.
After configuring your tag, it should look something like the example above. Go ahead and save it.
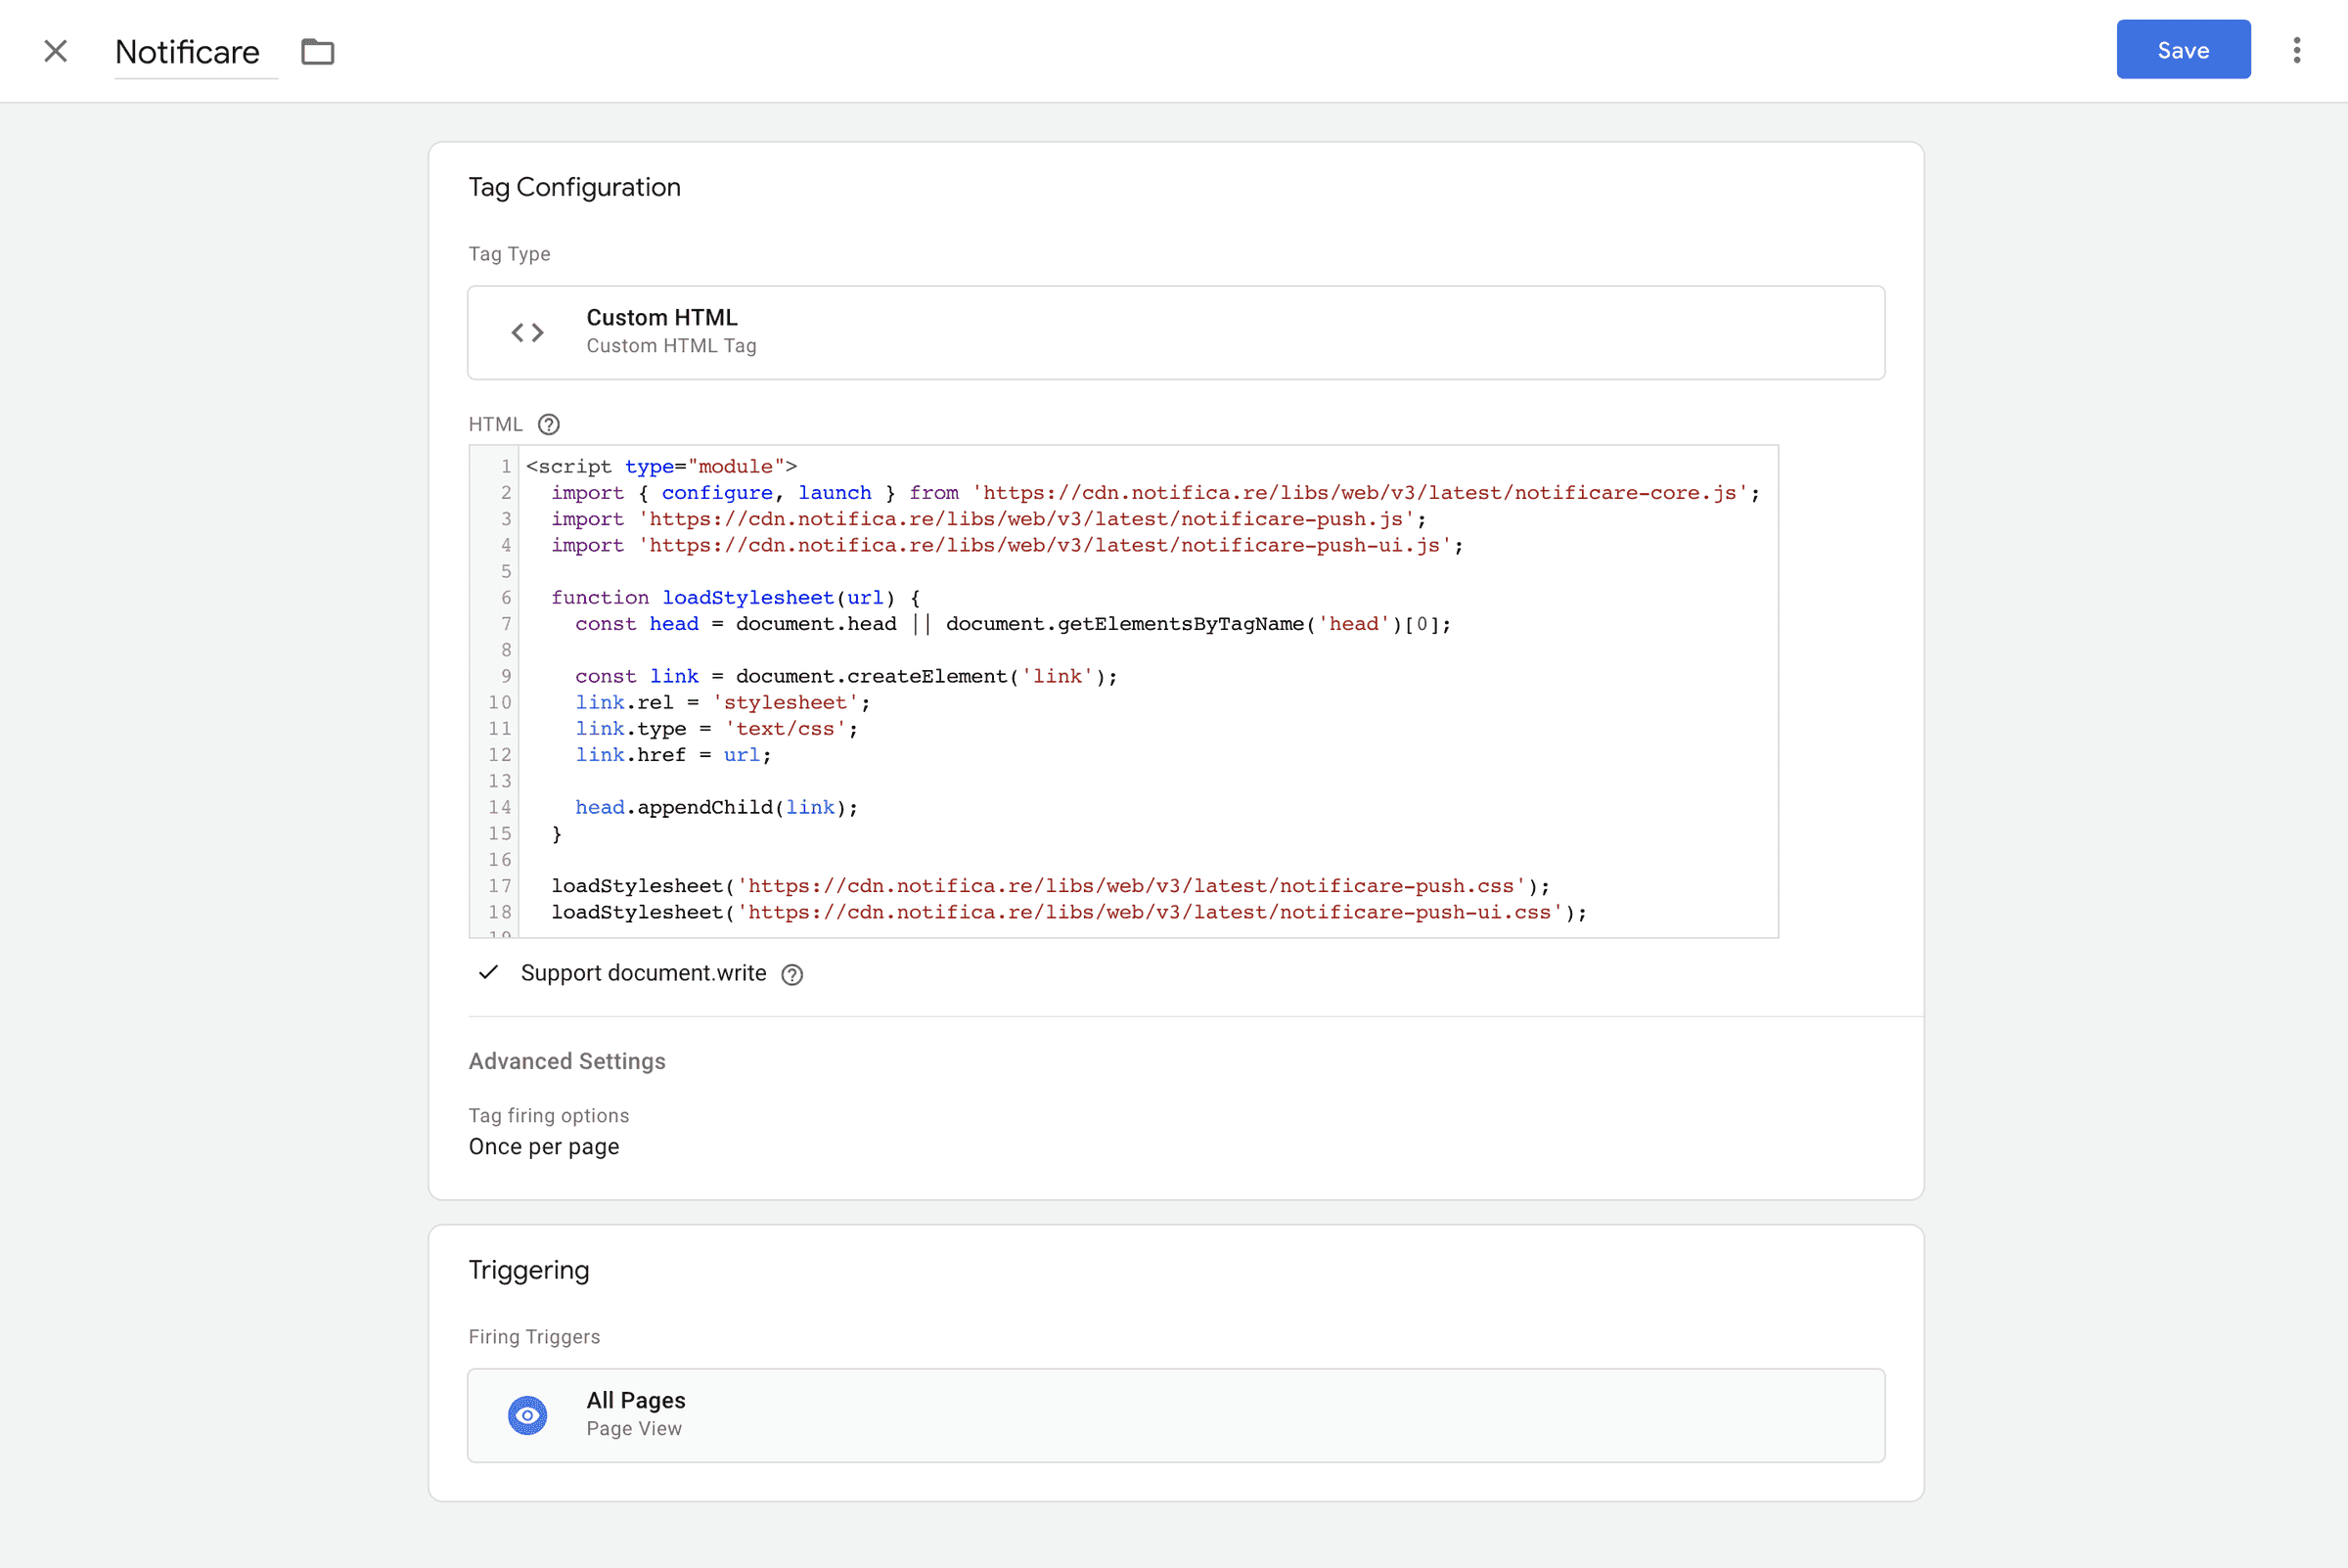
Once you are done, your tag should look like this. Go ahead and save it!
Releasing the tag
You're just one click away from making your tag live. Click the "Submit" button to release your tag into action.
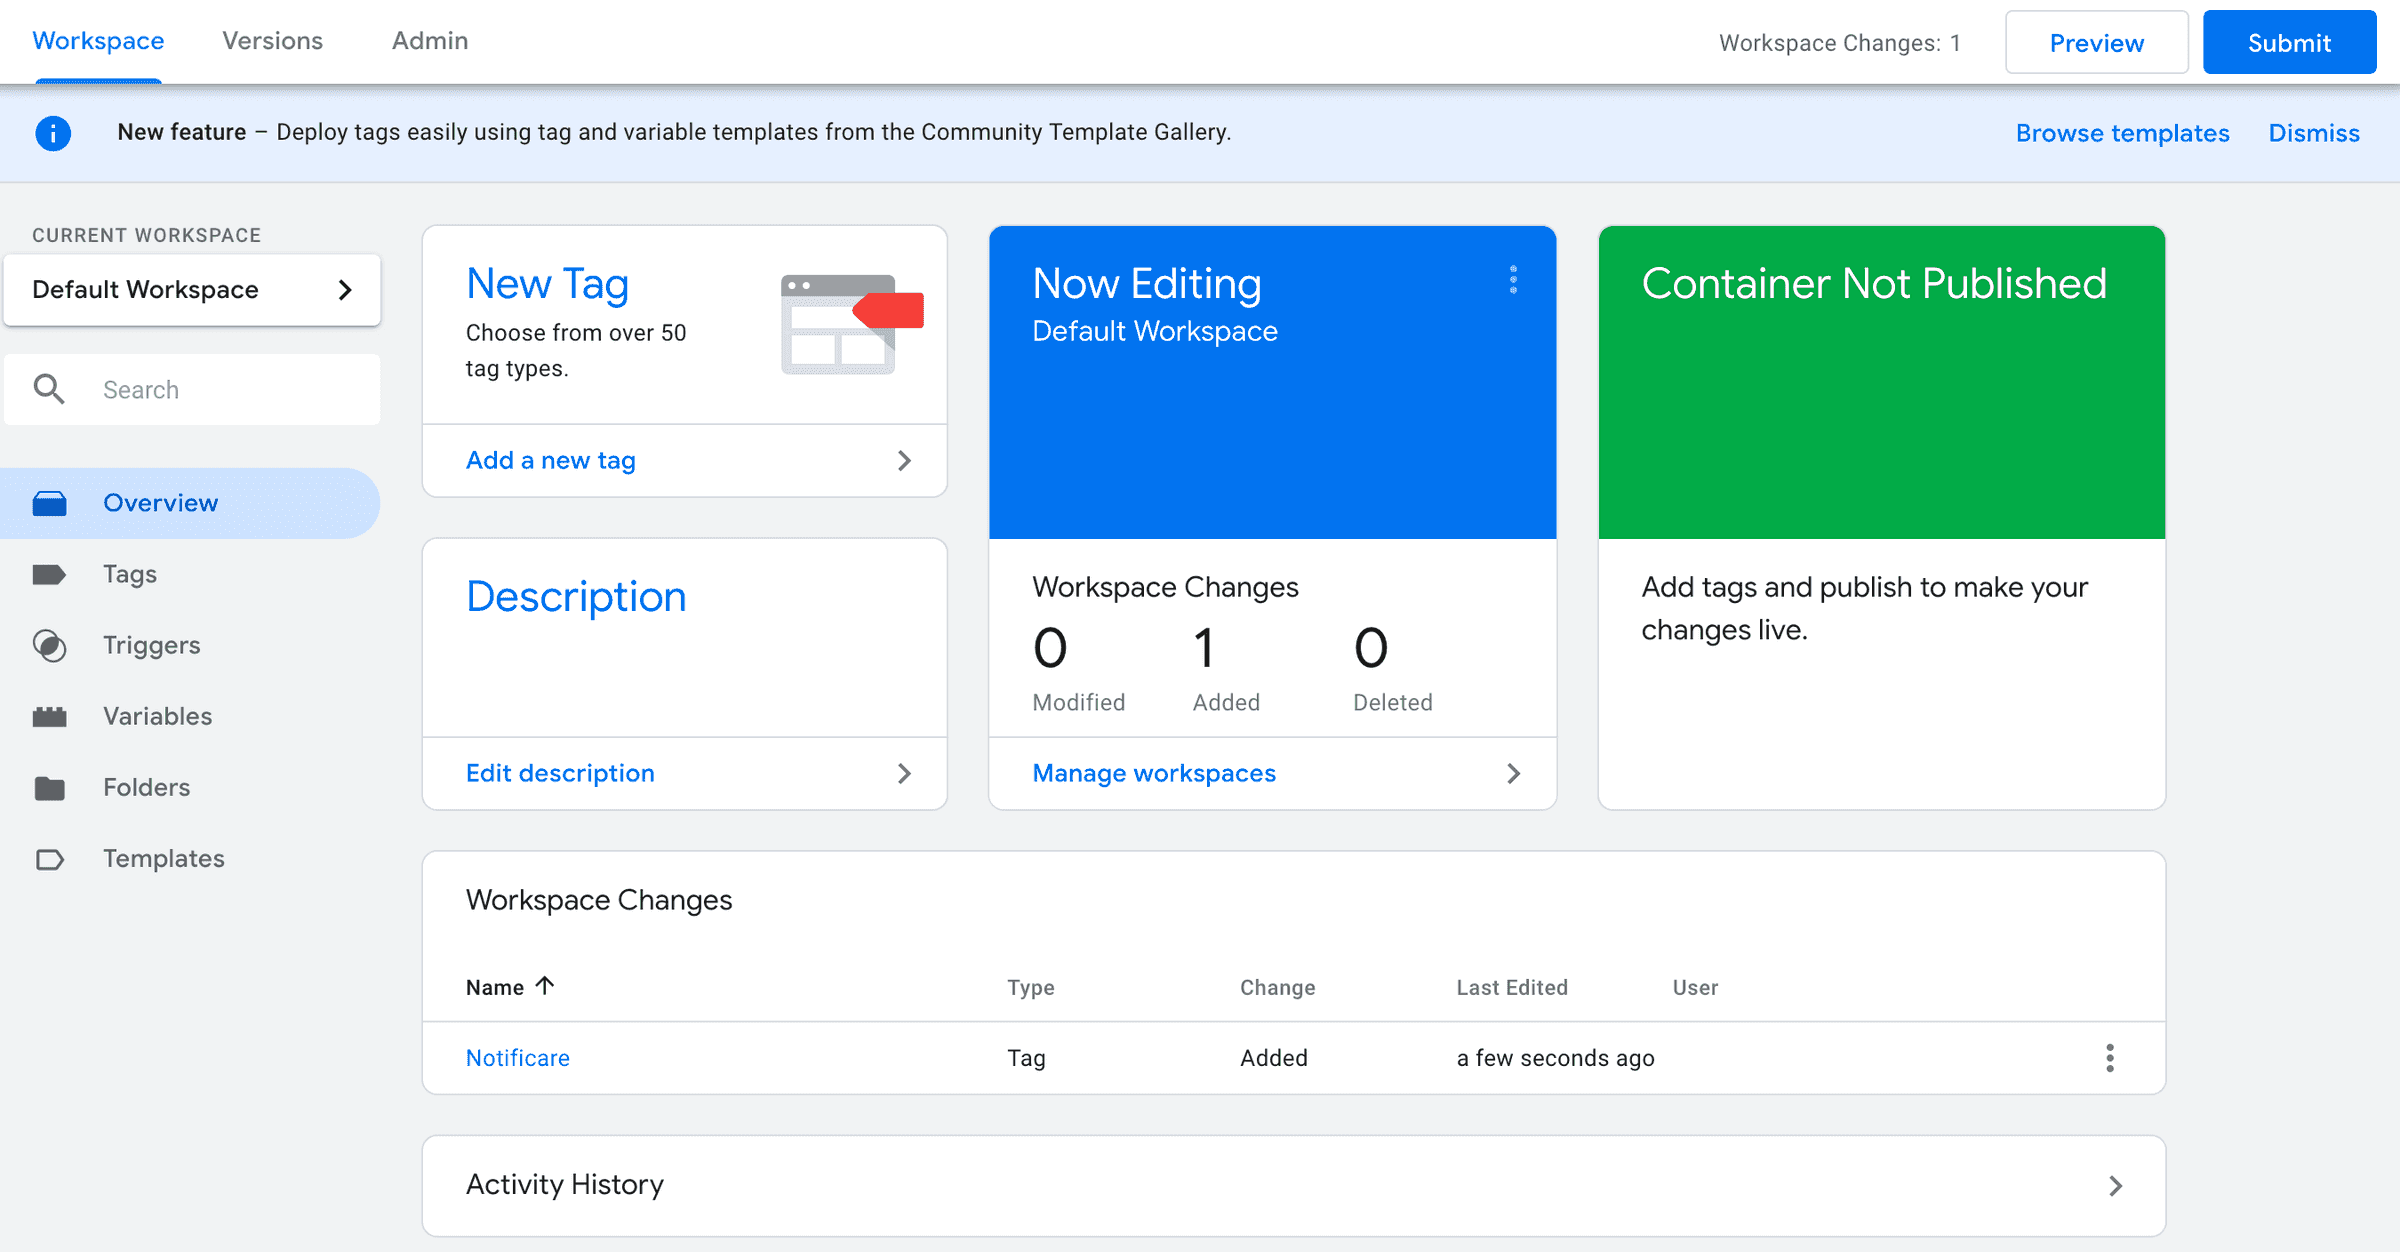
You've successfully implemented Actito with Google Tag Manager. As you can see, GTM tags simplify the integration process and can significantly reduce the workload for your development team. Plus, the flexibility to iterate, pause, or delete tags at any time ensures your business can adapt to evolving needs effortlessly.
With Actito and GTM working together, you're well-equipped to enhance user engagement, deliver timely notifications, and optimize your website's performance.
Categorizing visitors
After successfully registering push subscribers, one of the most prevalent scenarios is the need to categorize them based on factors such as their browser capabilities, profile characteristics, or preferences. You can effortlessly accomplish this by incorporating Actito Tags into your system. Follow these steps to modify your existing GTM Tag accordingly:
import { configure, launch, addTag, addTags } from 'https://cdn-mobile.actito.com/libs/web/v5/{{version}}/actito-push-sw.js';

// remaining code

try {
  configure({
    applicationKey: 'YOUR_APPLICATION_KEY',
    applicationSecret: 'YOUR_APPLICATION_SECRET',
  });

  await launch();

  await addTags(['a_tag', 'another_tag']);
} catch (e) {
  console.log('Something went wrong: ' + e);
}

document.getElementById('myTopicButton').addEventListener('click', async () => {
  try {
    await addTag('yet_another_tag');
  } catch (e) {
    console.log('Something went wrong: ' + e);
  }
});